This is the second part of the sixth step in completing your Sertifi for Zuora installation.
After you setup your custom settings for your Sertifi app, you must add the newly created Sertifi E-Sign button to the Page Layout of the object you setup Sertifi on. If you don't add this button to your page layout, no one can use Sertifi to send documents.
If you set up Sertifi on a custom object, the Sertifi Related List already appears on the page layout.
To add the Sertifi button:
- Enter Page Layouts into the Quick Find search bar from your Salesforce account.
- Click Page Layouts under the the latest version of the Zuora quote layout.
- Select Quote Layout - Default V8.0 or newer.
- Select Buttons in the object layout card.
- Click and drag the Sertifi E-Sign button where you want the button to appear.
- For Salesforce Lightning, navigate to Mobile and Lightning Actions, and then drag and drop the button into Salesforce Mobile and Lightning Experience Actions. If you can't drag and drop, override this by clicking override the predefined actions within the field.

- Navigate back to the top of the page, and then select Related Lists in the object layout card.
- Click and drag the Sertifi EContracts list where you want the list to appear.
- Click
 .
. - Select Created Date from the dropdown menu, and then click Descending.
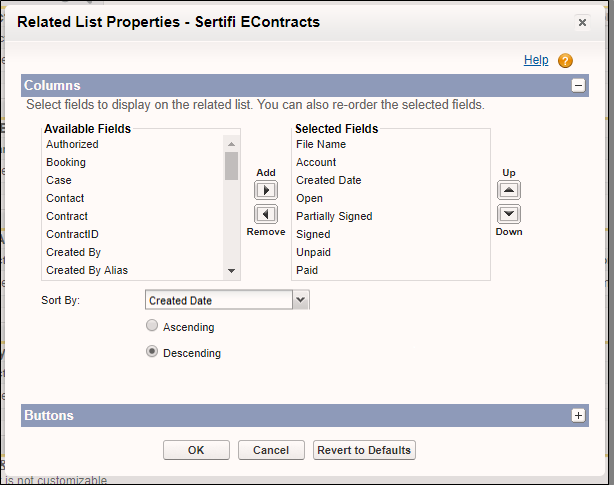
- Click + for the Buttons section.
- Deselect New and Change Owner.
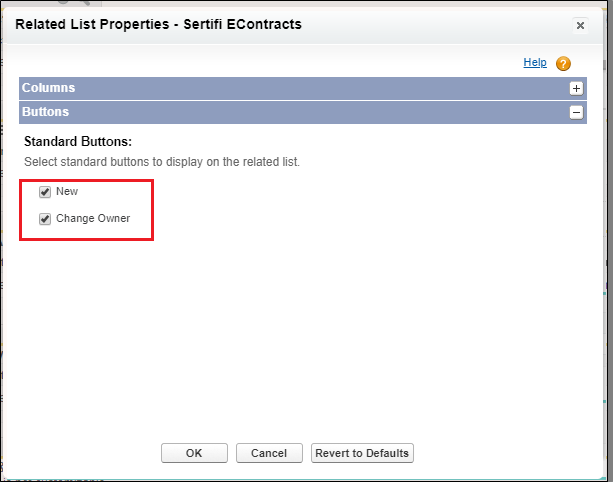
- Click OK.
(Optional) Customizing your EContract layout
Sertifi recommends customizing your layout so you see your most recent activity first.
- Navigate to Setup > Object Manager.
- Search for Sertifi EContract in the list of Objects.
- Scroll down to Page Layouts.
- Click Edit next to the Sertifi Layout.
- Scroll down to the EContract Activities related list.
- Click .
- Select ActivityTime from the Sort By dropdown menu.
- Click Descending.
- Click + to expand the Buttons section.
- Deselect New and Change Owner.
- Click Ok.
- Click Save.
Next step
Now you can move on to enabling real time updates for your account. For more information, see Enabling real time updates.